
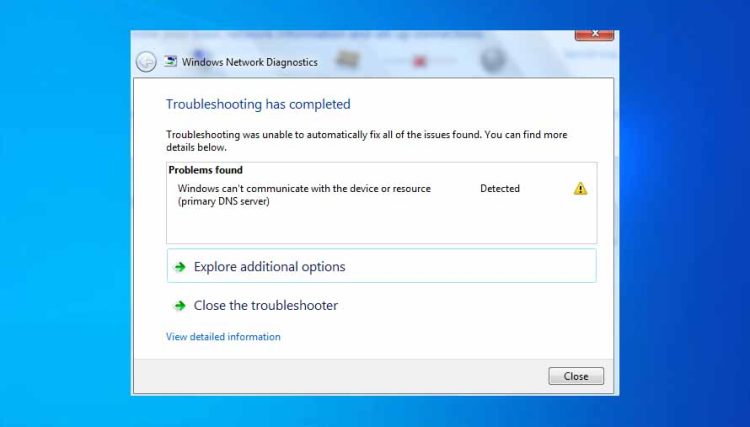
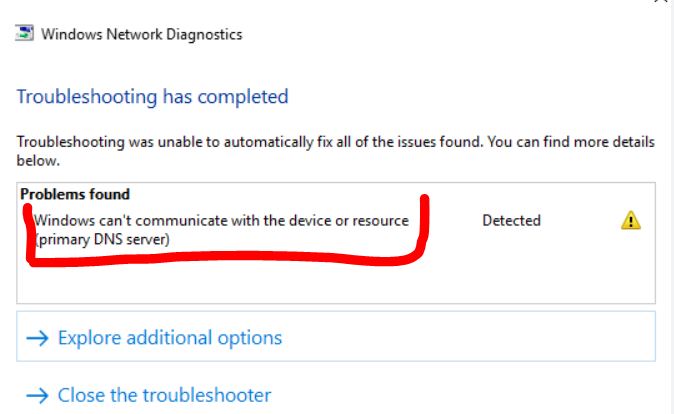
In most cases, the error Windows can’t communicate with the device or resource is related to your internet connection. In simple words, this means that your PC is unable to communicate with the DNS server on your network.
Now there could be many reasons behind this error like unconfigured DNS settings, firewall security issues, or any outdated network drivers preventing your PC to connect to an external network.
When such type of DNS error occurs, you are unable to access websites, remote printers, or devices on your network. This type of error usually shows up when you try to diagnose your internet connection. Therefore, it’s important to fix this error if you want to access the internet or remote network.
How to Fix Windows Can’t Communicate with the Device or Resource Error
To fix this problem, you should follow the troubleshooting steps below:
Solution 1: Check Network Cables and Router
If your PC is connected to your router through an ethernet cable, then make sure that both ends of that cable are properly inserted into the output ports. A loosely connected internet cable can also result in Windows can’t communicate with DNS server issues.
Sometimes faulty DNS settings saved on your router can prevent your PC from connecting to the internet. In that case, restart your router to revert back to the default settings.
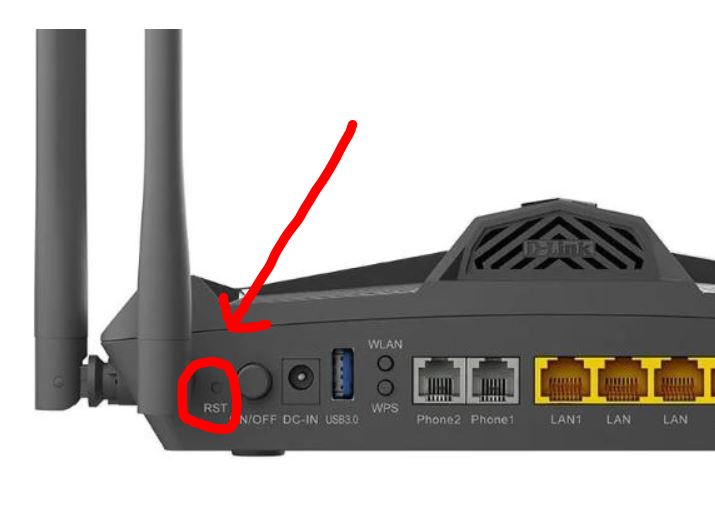
In some router models, there’s a dedicated reset button whereas other models have a small hole in which you can insert a pin or needle to restart your router.
After restarting your router or modem, see if the issue is resolved or not.
Solution 2: Disable and Re-Enable Network Adapter
This is one of my favorite methods to troubleshoot any type of internet connectivity issue. All you need to do is to go to your “Network Connections” tab and select your Network Adapter.
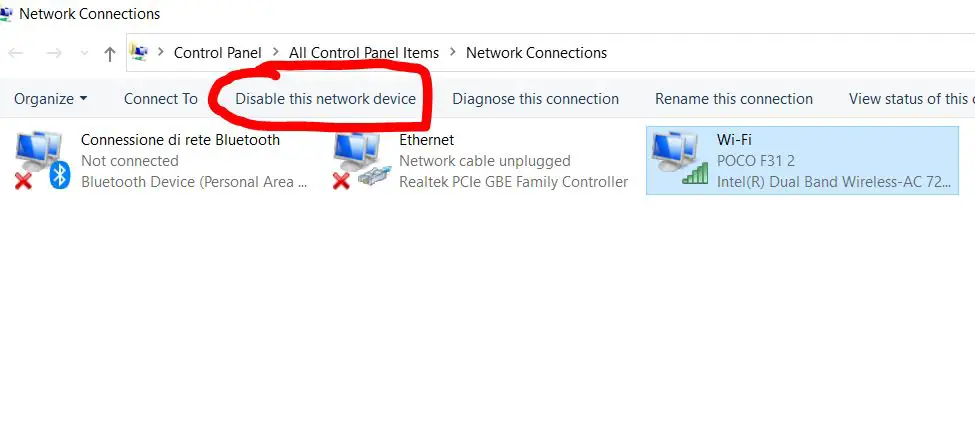
Once you have selected your Network Adapter, click on the Disable this network device option located on the top menu. In order to re-enable the device, simply select it, then right-click on it and select Enable.
Solution 3: Renew IP Address and Flush DNS Cache
If the above two methods didn’t work for you, then maybe it’s time to renew your IP or flush your corrupt DNS cache to resolve the network connectivity issue.
Here’s how you can do this:
Renew IP Address:
Whenever your PC connects to an external network, it is assigned a unique IP Address. But if there are many devices connected to your network, then the chances of IP conflicts are higher, resulting in errors like Windows can’t communicate with the resource network.
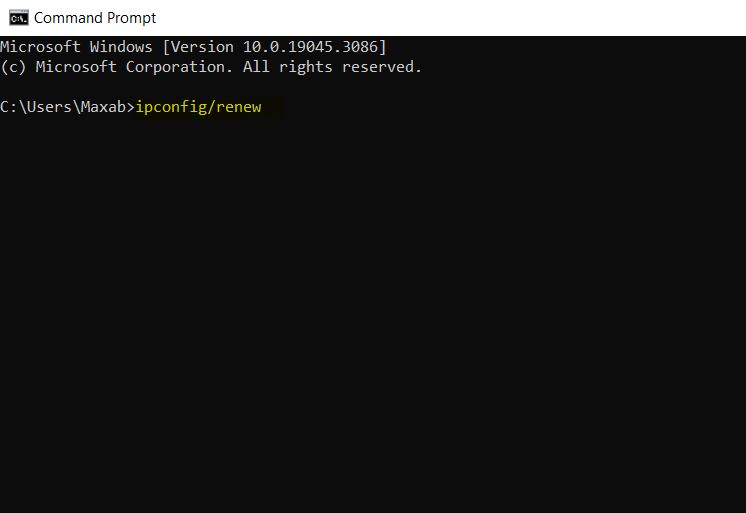
In order to renew your IP Address, follow the steps below:
- Type “cmd” in the search bar at the bottom and press Enter.
- Once your enter the Command Prompt, type ipconfig /renew and press Enter.
- Done, you now have now a new IP Address assigned by your network.
Flush DNS Cache:
DNS or Domain Name System is used for translating domain names (read by humans) into IP Addresses. The DNS Cache refers to a small portion of data that your computer for storing IP addresses in order to retrieve it immediately when needed. DNS Caching helps in improving site load times and reducing bandwidth.
Sometimes, information stored in the DNS Cache can become outdated or corrupt as you access multiple websites on your computer. All of this can lead to errors like Windows not communicating with the device or resource server.
Therefore, flushing your DNS Cache removes all the unwanted junk and outdated IP addresses and retrieves new DNS information.
To flush the DNS, follow the steps below:
- Go to Command Prompt and type “ipconfig /flushdns“, and press Enter
- Once done, wait for a few seconds until Windows finished the DNS flushing process.
Solution 4: Reset TCP/IP Stack
If the above method doesn’t work to resolve the internet connectivity issue, then it’s time to reset TCP/IP stack. The TCP/IP stack is a type of protocol that is responsible for communication among devices connected to the internet.
The TCP/IP stack includes a number of settings like IP Address, DNS, and TCP/IP configuration settings. By resetting TCP/IP stack, you reverse all the current settings back to their default settings.
In order to reset TCP/IP, follow the procedure below:
Right-click on the Start Menu and select “Command Prompt (Admin)” or the Windows Powershell option.

Once you are inside Command Prompt, type in the command below one by one by pressing Enter:
- netsh winsock reset
- netsh int ip reset
The first command is responsible for resetting the Winsock catalog and the second one is known for resetting all the TCP/IP configuration settings.

Solution 5: Disable Firewall or Security Software Temporarily
If you don’t want to take the risk of disabling the firewall, then you can simply skip this step and move on to the next one. But in most cases, your firewall or antimalware program can block network connections.
So temporarily disabling your firewall or security application can help you in establishing your internet connection.
Here’s how you can do this:
- Go to Control Panel.
- Once inside Control Panel search For Windows Defender Firewall
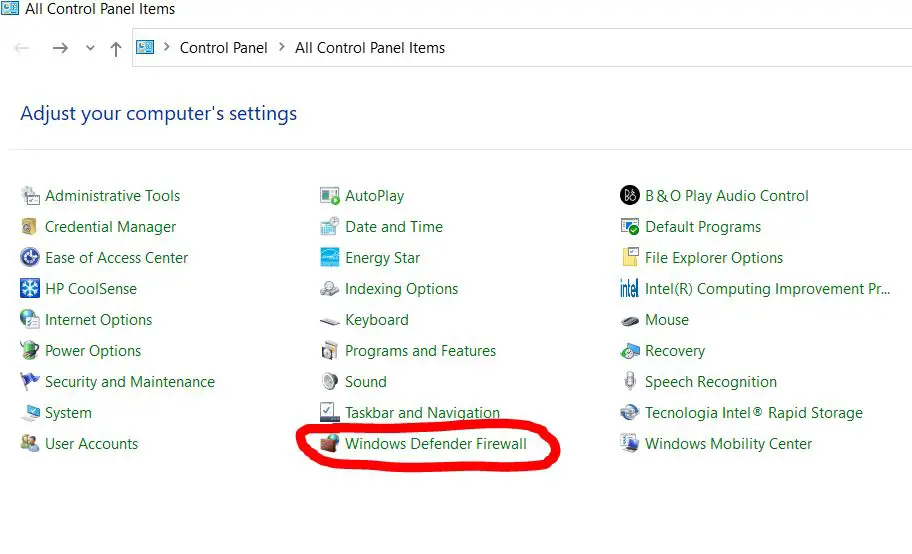
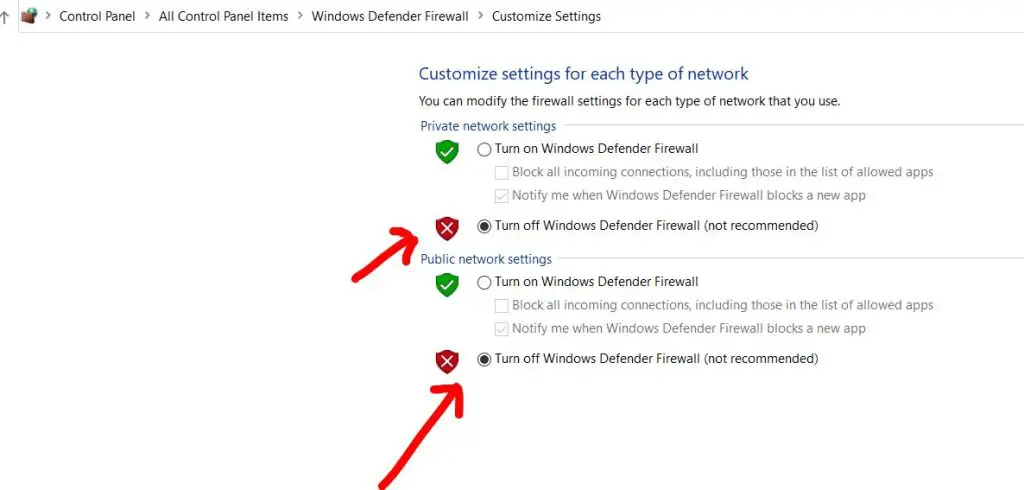
- Now click on the Windows Defender Firewall, this will open a new Window. At the left-hand side panel, you will find the “Turn Windows Defender on and off” setting, click on it to open it.
- Now simply turn off the Windows Firewall and click OK at the bottom to save the settings.
Solution 6: Update Network Drivers
Do you remember that I said at the start of this guide that corrupted network drivers can also contribute to errors like Windows can’t communicate with the device or resource DNS network?
You can simply update your network drivers to overcome this issue.
In order to update your network card drivers, follow the process below:
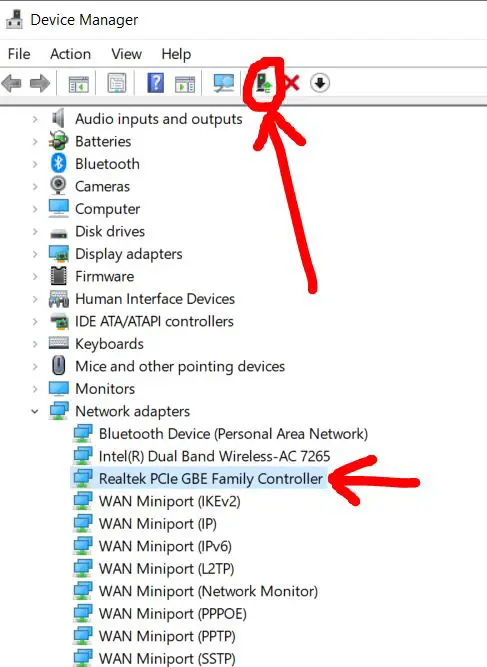
- Go to the search bar at the bottom and type “Device Manager“, select and open it.
- Once you are inside Device Manager, look for “Network Devices“, expand the menu, and search for your Network card.
- Once you find it, select your network card and click on the “Update Driver” icon at the top of the menu. See the image below for reference.
Solution 7: Adjusting IPv4 and IPv6 Settings
This is an Advanced step in troubleshooting internet connectivity issues related to the DNS server. However, changing IPv4 and IPv6 protocols can help in retrieving the internet connection and getting things back to normal.
Here are the steps that you need to follow:
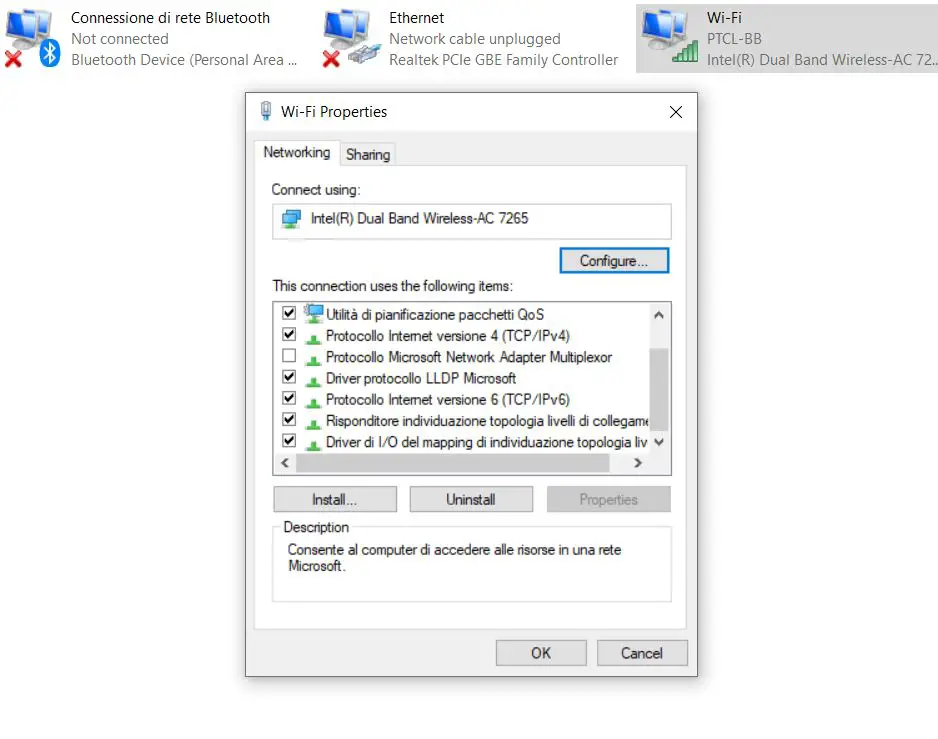
Step 1: Go to the search bar at the bottom and type in “Network connections”. Once inside, select your network adapter, right-click on it, and select “Properties“.
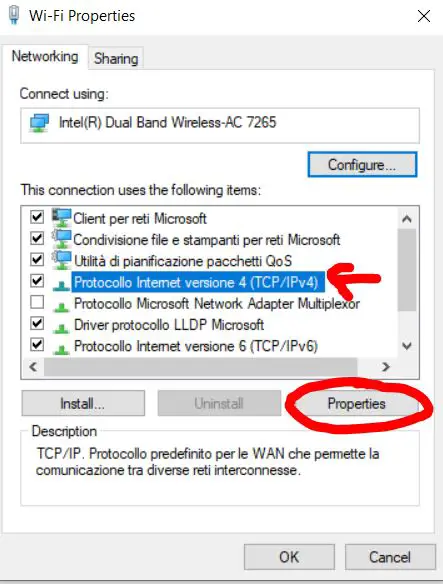
Step 2: Now look for Protocol Internet Version 4 TCP/IPv4 option and click on Properties.
Step 3: Now select “Obtain an IP address automatically” & “Obtain DNS Server address automatically” and then click on OK.
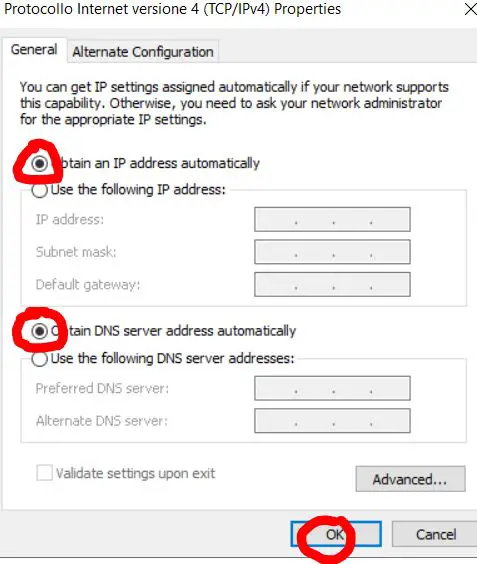
Do the same for the IPv6 protocol and then reset your computer to see if the issue is fixed.
Solution 8: Disable Any VPN or Proxy Settings
If you have installed VPN or altered your proxy settings, then you’ll more likely come across internet connectivity issues.
If so, it’s better to disable any VPN or Proxy program installed on your computer. If you have installed a third-party VPN, then you can simply open up the VPN utility to find the disable button.
But if you find it difficult to disable VPN, it’s better to simply uninstall it from the Control Panel.
In the same way, if you have manually changed the proxy settings, then I highly recommend you disable it.
Here’s how you can disable the proxy in Windows:
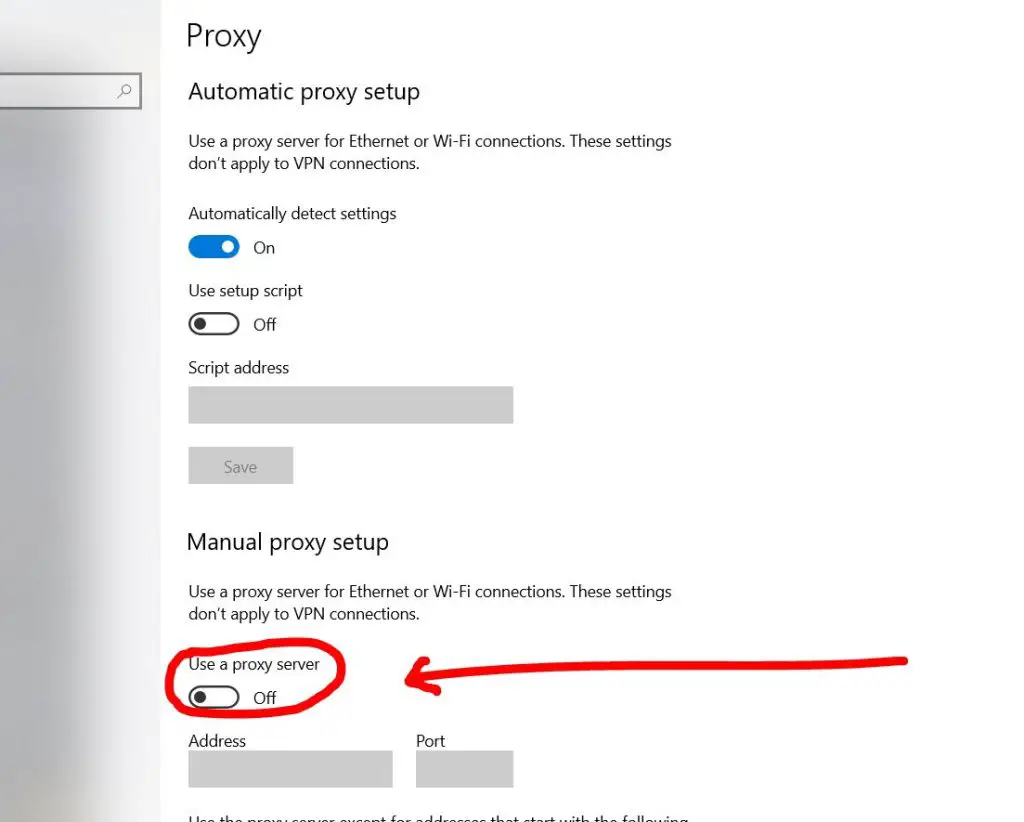
- Go to the search bar at the bottom and type in “Proxy settings” and open it.
- Now simply turn off the “Use the proxy server” option and click on OK to save the settings.
Solution 9: Editing Hosts File
May be the hosts file inside your computer is preventing your PC from connecting to the DNS server. Therefore, we need to remove all the data saved inside the hosts file.
In order to access the hosts file, follow the method below:
- Go to Windows (C:) > Windows > System32 > drivers > etc and locate the hosts file. Now right-click on it and select “Open with” Notepad
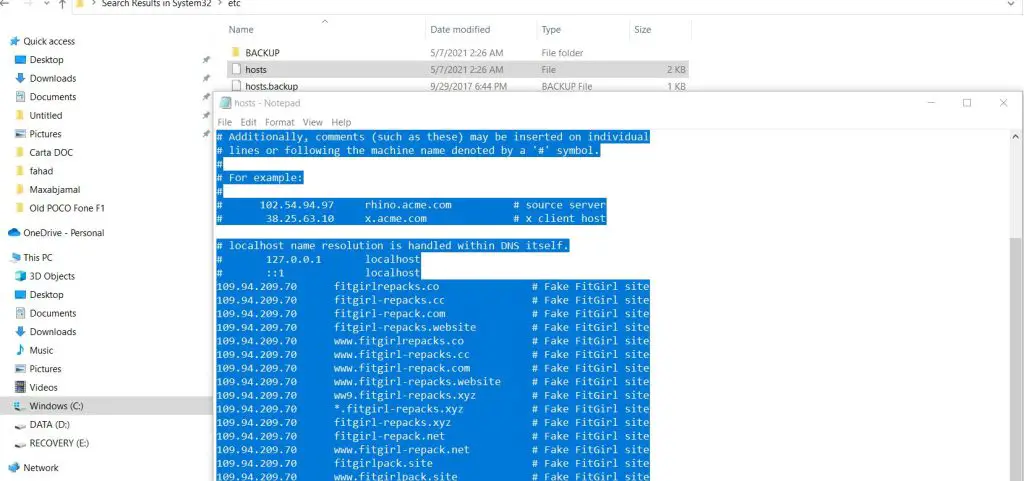
- Select everything inside the hosts file and delete it.
- Now “Save” the file and close it.
Solution 10: Try Connecting to Different Network
If none of the above methods works for you, then maybe there’s something wrong with your internet service provider. Another scenario could be that the host computer might not be responding to your data requests.
Try to connect your computer to another network to see if that helps in establishing the internet connection.
Final Thoughts and Suggestions
So these were some of the effective solutions to fix Windows that can’t communicate with the device or resource DNS server. Always start from the basic steps like checking ethernet cables or resetting your router to get rid of this issue.
If that doesn’t help, then renew your IP or reset your TCP/IP stack configuration. Following these steps can help in resolving the DNS server connectivity problem. Maybe you have to update your network drivers at this point if those are the real culprits.
If these tips don’t work for you, then I highly recommend changing your network to make sure it’s not the problem from the ISP side. Let me know which one of these methods helped you fix the issue.

Hi, this is Masab, the owner and founder of the PC Wire. I’m a PC enthusiast who loves to talk about computers. I have been testing PC hardware for several years now, and I hope my knowledge would answer your queries thoroughly.