
How to plug a guitar into a computer? The smooth integration of computer technology with instruments like electro-acoustic guitars has emerged as a keystone of sound innovation in the current digital music era. This guide will assist you in getting the optimum quality of sound when connecting your guitar to computer, regardless of whether you like electric, acoustic guitar, or a variety of electro-acoustic instruments.
I will start with the essential function of audio interfaces, that convert the output jack signals from your guitar into digital audio workstations (DAWs). I’ll examine a variety of audio interfaces, their role in preserving quality sound, and how they meet both acoustic guitar and electric guitar needs.
I’ll also talk about the importance of a real guitar amp in enhancing sound output, including the use of DAW guitar amp models to mimic genuine guitar amps.
Whether you play electric guitar or acoustic, this guide offers comprehensive instructions on how to connect your instrument straight to a computer. I’ll go over how to use a standard guitar cable, figure out your instrument’s input jack, and make sure the audio interface’s USB port provides a steady connection.
I’ll go into detail on recording sessions as well, focusing on the benefits of USB connections for electric guitars and the importance of a good microphone input for acoustic guitar instruments.
I will also go over more advanced topics like using an expression pedal or multi-effects pedal to improve your guitar recording.
If you’re looking for computer connecting options, I’ll guide you through the details of selecting the best jack cable, USB output, and the best sound quality.
This guide guarantees a pleasurable and educational experience in the guitar’s output jack to digital realms, whether you’re exploring the realms of sound with amp models and effects or reaching the details of a guitar recording with a direct USB interface.

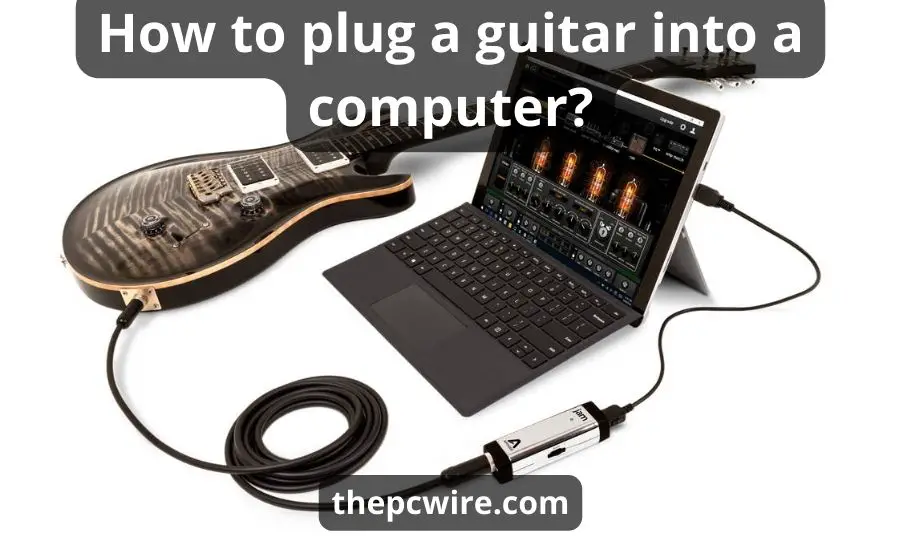
A step-by-step guide on how to connect a guitar to a computer
Here is a step-by-step guide on how to connect guitar directly to a computer:
Connect your PC to your audio interface
Use the included USB cable to connect the audio interface to a free USB port on your PC.
Installing the included software is required if this is your first time using a new audio interface. Many software packages are included with most audio interfaces; nevertheless, the following are to be installed first:
- ASIO driver: crucial for audio latency, quality, and performance
- Utilities: Usually, a software utility that is provided allows you to adjust the driver settings, routing, and input type.

Connect your audio interface to your guitar
About this one, not much can be said. Make use of a regular jack cable, the same kind you use to link your amplifier and instrument. Connect one end to the jack output on your guitar and the other end to an available jack input on your audio interface.
Just to clear up any confusion, playing electric guitar without an amplifier is possible in a few different ways. One of them is by connecting your guitar to your computer.
Set up the input type
There are some audio interface inputs where the input type is selected via a hardware or software switch. If this applies to you, check that the input type that your guitar is connected to is set to “instrument” rather than “mic”.
Additionally, if the “Line” setting on your input is selectable, make sure it is turned off or set to the other option, which is most likely “Instrument”. Keyboards and synths are examples of instruments with line-level outputs, and they need line inputs.
Set the input level on the audio interference
It’s crucial to adjust the input level, particularly when recording. The level should be as high as it can be without “clipping”. Unpleasant distortion or other undesirable audio distortions will arise from clipping.
The audio interface’s “Gain” control for input allows you to adjust the level. Additionally, there will be a clipping indicator for the input, which is often a red LED.
As you begin to play your guitar, gradually increase the gain. There will come a time when the clipping indication becomes active. When it occurs, slightly reduce the gain. Play more and tweak the gain till the level reaches its maximum without ever clipping.

Connect speakers or headphones to your audio interface
You must have speakers or headphones connected to your audio interface if you wish to hear anything.
Typically located on the front of the audio interface, a standard headphone connector is used to connect headphones.
Just connect them to a smartphone, hi-fi, MP3 player, or any other consumer audio device.
Use an adapter if required.
Speaker-out connectors, which are typically located on the interface’s back, are used to connect speakers. One for the “Left” and one for the “Right” will be present. Any of the following could be used by you.

Start your program and set up the inputs and outputs
Even if you’ve connected everything, at this point you probably won’t hear anything. For your software to use the associated inputs and outputs, it must be operating and set correctly.
Choose the output that your headphones or speakers are connected to
It might be necessary for you to adjust the ASIO driver from the software’s settings. Although it sounds frightening, this isn’t.
Set level in the DAW/amp sim
Most of the level-setting work has been completed by now. But you also need to be mindful of the levels within your software.
There might be a setting to adjust “input gain” or “input level” in your DAW or amp sim. As with the audio interface input, make sure that there is no clipping at all.

Increase the volume on your speakers or headphones
I purposefully left this step until the very end. Turning down the volume while connecting the equipment and setting things up to avoid annoying pops. In severe situations, these might harm your headphones or speakers.
Turn the volume up gradually to the appropriate level.
Overindulgence in noise is a sign that something isn’t configured properly. Check to see if you correctly completed the earlier steps by going back.
Choose a sound
The fact that amp simulations frequently offer a wide variety of sounds is one of their many wonderful features. It seems as though you have hundreds of distinct pedal boards and guitar amplifiers!
How to choose an audio interface?
Before choosing one, consider the following questions you should ask yourself:
- Are you going to record multiple instruments at the same time?
- Will you be recording vocals?
- Will you be recording an acoustic guitar song? If yes, are you going to record using a microphone or line-in?
- Have you used DAW software before?
- Would you prefer to be able to record or play content using a tablet or smartphone?
What really makes the difference is your use case. Seeking the best quality is important if you’re recording intending to sell your music, sending it to record labels, streaming it, or making it available to the public in general. This will almost always require a specially designed USB interface. The top pick in this case is the Focusrite Scarlett Solo.
How to Manage Your Tone and Effects?
Stompboxes and foot controllers allow you to switch between amp channels or effects when using a standard guitar and amp setup.
A MIDI foot controller can provide you the same control over your guitar effects and tones when you run your setup through a PC.
You just plug in a MIDI foot controller to your PC. You can configure the foot controller in your DAW to control about anything you’d like.
Here are a few things you can program your foot controller to do:
- Modify the presets or amp tones.
- Turn each on and off each effect separately.
- When using wah, loudness, or whammy effects, use an expression pedal.
- To dynamically adjust any effect preset (such as the chorus depth, gain level, delay length, etc.), use an expression pedal instead of a multi-effects pedal.
- Use a footswitch to begin recording or to begin playing a backing track. Initiate any additional plugins or samples.
- The ability to control your tone and effects with your feet greatly enhances the sound of a guitar and PC setup. You can perform tasks that the majority of conventional guitar rigs are unable to.

What are the basic requirements for connecting a guitar to a computer?
Here are the basic requirements for connecting an electric or an acoustic guitar to a computer:
Audio interface
This is the most important requirement. This gadget serves as a link between the computer and your guitar.
It transforms your guitar’s signal into a digital version that is understandable and useable by your computer.
Guitar and cables
Naturally, you’ll need your guitar. You’ll also need cables. A normal ¼-inch guitar cable is used for electric guitars. The same kind of wire can also be used with acoustic guitars that have built-in pickups.
You may require a microphone to record the sound of your acoustic guitar if it is without a pickup.
The microphone should be connected to an audio interface.
Computer with appropriate software
To connect the audio interface, a computer with a USB interface port is required. The majority of PCs are appropriate for this use.
Guitar Amp
Using a guitar amp can significantly improve your sound, although it’s not necessarily required. There are other ways to link a guitar amp to your computer configuration. Some people prefer to mic their guitar amp, picking up the sound using a separate microphone connected to the audio interface.
Some use a guitar amp that has an integrated USB port that enables a direct connection to the computer. There are also guitar amp with a line-out option that may be attached to the audio interface.

Correct equipment setup and configuration
It’s important to configure the software and driver settings on your computer as well as set up your equipment appropriately. This guarantees that the signal from the guitar amp is correctly recorded and handled by your computer.
These fundamental conditions must be satisfied for you to effectively connect your guitar to a computer and begin recording, creating, and experimenting with the sound of your guitar.
What are some tricks for getting the best audio out of a guitar linked to a computer?
There are a few important factors and tricks to remember when connecting a guitar to a computer to get the optimum quality.
To assist you in optimizing sound quality, consider the following advice:
Use a high-quality audio interface. In the signal chain, the audio interface is essential. Select an interface that features high-resolution analog-to-digital converters and decent preamps to guarantee that the signal from your guitar is recorded correctly.
Set your gain levels correctly. Pay close attention to the input gain levels on your audio interface. The objective is to maintain sufficient signal strength for high-quality recording while avoiding clipping, which occurs when the signal becomes excessively loud and distorted. The goal is to have a clear, powerful signal free of distortion.
Excellent cables and connections. Make sure all of the connections are safe and use guitar cables of the highest caliber. The quality of the sound might be diminished by interference and noise introduced by poor connections.
Setup and maintenance for guitars. Make sure your guitar is in good shape. This covers intonation, tune, and stringing correctly. An instrument that is kept up to date sounds better and has an impact on recordings.
Ambiance & acoustics. If at all possible, record in a quiet space. Reduce background noise and reflections from the control room to enhance the quality of your recording.
Consider the Direct Input (DI) Box for acoustic guitars. If you’re recording an acoustic guitar, especially one with an integrated pickup, you should think about using a direct input (DI) box.
Optimize your computer’s audio settings. Verify that the audio drivers and settings on your computer are set up properly for your audio interface. This can include your digital audio workstation’s (DAW) bit depth, sample rate, and buffer size parameters.
Monitoring. For precise sound monitoring, use studio monitors or top-notch headphones. This will enable you to assess the mix and quality of the sound more accurately.
Try several Mic placements. If you use a microphone for your guitar, try several locations to see what produces the greatest sound. The tone that is recorded can be greatly impacted by the microphone’s placement on the guitar.
Software and effects. Use the effects and plugins in your DAW wisely. Although effects can improve the sound, they can sometimes be overdone or applied poorly, which lowers quality. Start with light effects and add more as necessary.
Maintain Software and Firmware Updates. To guarantee optimum performance and access to the newest features and enhancements, routinely update the software in your DAW and the firmware on your audio interface.

What Benefits Come with Directly Recording Guitar to a Computer?
Direct guitar recording to the computer has several benefits that address quality and convenience.
The following are some main advantages:
Portability and convenience. It’s very practical to record straight to a PC. Almost anywhere may be used to set up a recording environment, from a home studio to an improvised setup in your living room. Musicians can record whenever inspiration strikes thanks to this portability.
Access to a vast variety of sounds and effects. Digital audio workstation (DAW) software offers a wide range of digital audio effects and amp simulations that are available when you record straight into a computer. This arrangement puts a multitude of sounds and effects at your fingertips while doing away with the need for actual pedals and amplifiers.

Better quality of sound. Digital recording can produce sound that is crystal clear. High-fidelity recordings may be made using modern audio interfaces and DAWs, capturing all the subtleties of your guitar’s sound without any of the noise that can result from miking an amp.
Simple editing and manipulation. Editing your recordings is quicker and easier when you record straight onto a computer. Analog recording does not allow for the same level of track manipulation, cutting, copying, pasting, and other operations. More creativity and experimentation are possible because of this freedom.
Cost-effectiveness. Direct recording to a computer can prove to be more economical in the long term, even though initial investments in software and an audio interface are necessary.
It does away with the necessity for pricey recording gear, such as amplifiers and high-end microphones.
Instantaneous feedback and monitoring. Direct recording enables monitoring and feedback in real-time using studio monitors or headphones. You may quickly modify your playing or recording settings thanks to this immediacy.
Simplified mixing and mastering process. You can streamline the production process by mixing and mastering your tracks in the same DAW.
From recording to final production, the workflow is made possible by this integration.
Less acoustic treatment is needed. Compared to miking an amp, recording a guitar straight to a computer usually requires less acoustic treatment of the recording environment because you’re not capturing noise from the amp or the room.
Capability to record many takes conveniently. Digital recording eliminates the need to worry about tape or physical media, making it possible to record many takes.
This facilitates experimenting with various styles or tactics and capturing the greatest performance.
Environmentally friendly and space-saving. Digital recording uses fewer resources than tape because it doesn’t require physical media, which can be produced with a lot of energy. It also conserves actual space in your studio setting.
In essence, both amateur and professional musicians find direct computer recording of guitar to be a very enticing combination of quality, adaptability, and ease of use.
It streamlines many aspects of the recording process and permits more creative freedom.

FAQ
Use an instrument cable to connect the output of your instrument to an audio interface or the computer’s input to connect your musical instrument to your computer. All you need to do to start playing or recording is set your music software to detect the input source.
Yes, you can connect your guitar directly to your computer, but to do it efficiently, you’ll usually need an audio interface.
Conclusion
The process of connecting an acoustic or electric guitar to a computer is proof that traditional music and contemporary technologies can coexist. Through the use of an audio interface, musicians can access a realm where the richness of digital invention meets the tactile sensation of guitar strings.
This revolutionary union of the acoustic and digital domains is revolutionizing the art of composing music. Every electric or acoustic guitar that is connected to a computer offers the chance to experiment with different tonal possibilities. An essential channel that makes sure every aspect of the guitar’s tone is correctly transferred into the digital realm is the audio interface.
This arrangement uses a guitar amplifier to enhance the instrument’s richness of sound and introduce the warmth of classical guitar playing into the digital realm.
Furthermore, by including a multi-effects pedal, guitarists can broaden their range of tones and textures, increasing their musical pallet.
This setup turns a computer into an audio lab where traditional riffs and state-of-the-art effects blend to produce sounds that were unimaginable a few years ago.
Whether they are playing an electric guitar on a digital stage or strumming an acoustic guitar in a quiet room, musicians are redefining guitar playing through the recurring connection of a guitar to a computer. This is not simply preserving the core of guitar playing.
To sum up, the act of attaching a computer to a guitar represents the harmonic fusion of electric and acoustic instruments, tradition, and innovation, as well as the past and future.

Hi, this is Masab, the owner and founder of the PC Wire. I’m a PC enthusiast who loves to talk about computers. I have been testing PC hardware for several years now, and I hope my knowledge would answer your queries thoroughly.
1 thought on “How to plug a guitar into a computer? [Top 9 Steps]”