If you have ever typed on a mechanical keyboard and I bet you did, then you’ll know why everyone loves going for them. It’s much easier to type on a mechanical keyboard when you get that strong tactile feedback from it. But there’s one more thing that comes along with them, and that’s the “Noise”.
Now there are many ways to overcome this issue, either you can go for a much quieter keyboard or you can modify your current mechanical keyboard by applying o-rings to make it silent.
What are O-Rings?
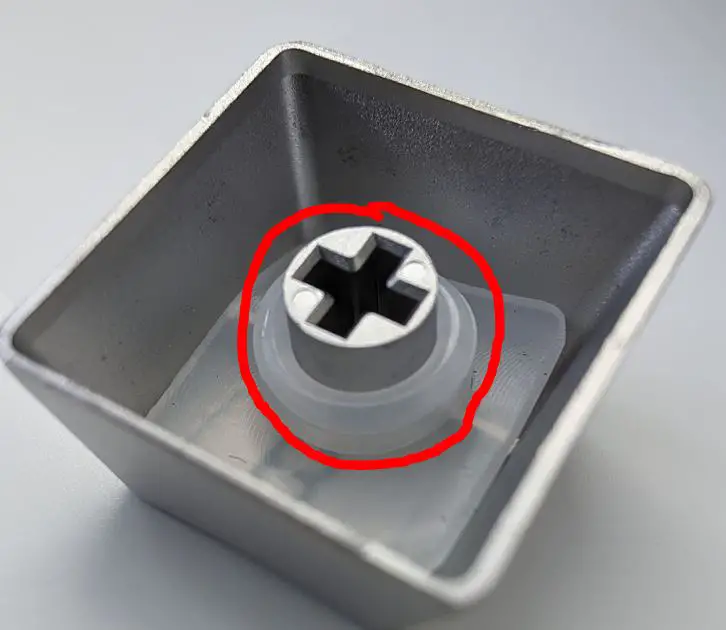
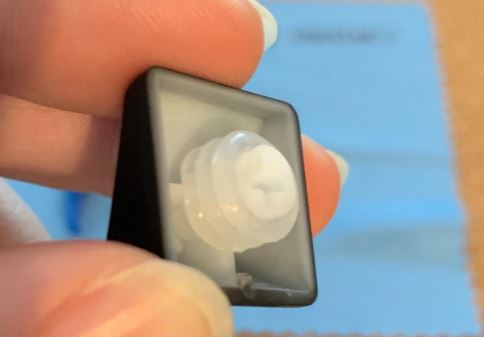
O-rings are rubber rings that act as shock absorbers when applied on the stem of a keycap. The role of O-rings is to prevent the keycaps from touching the base of your keyboard, which may otherwise result in a stroking or clicking noise.

O-rings come with different levels of softness, the most common ones are 30A, 40A, 45A, and 60A. These are known as durometer numbers, in which the hardness increases are you move up to the higher number.
How O-Rings Help In Changing the Way You Type?
Well, O-rings are the cheapest DIY upgrade that you can do to silence your noisy keyboard. If you are using Cherry MX switches, then you’ll suffer from that “thwack” sound whenever you press any key all the way to the bottom.
The type of sound that you’ll hear depends upon the material of the switch, height, distance from the base, and mounting plate material.
So, the O-rings put a veil on all of these flaws by shortening the distance between the keycap and the bottom plate of your keyboard. As the distance becomes shorter, there’s less force exerted on the keycap.
Once, you’ll apply the O-rings to the stem of your keycaps, you’ll feel the difference by yourself. Installing the O-rings would make your keys stand firm to the base, thus eliminating any wobble.
Furthermore, once you stoke on a specific key, it will take less time for it to move back to the initial point. All of this would help you to type fast on your keyboard without hitting the wrong button.
So, if you have a keyboard with clicky switches, then you can benefit a lot from O-rings. At first, you may find O-rings a bit stiff when typing over them. But you’ll get used to them in a day or two if you are a frequent typist.
Also, O-rings aren’t the only deal to go with. Sometimes, the bad quality of the keycaps can hinder the way of O-rings and you may hear the same irritating noise. Therefore, always start by installing O-rings on a few keycaps and see if that’s making any difference.
How to Choose O-Rings for Dampening the “Thock” Keyboard Noise?
There are a number of factors that you need to look for:
Thickness
So, the thickness of the O-rings has two jobs to deal with at this point, the first is to dampen the “thock” noise and the second is to reduce the travel distance between the keycap and the keyboard bottom.
You can go for thinner O-rings which can reduce the noise levels, but up to some extent. Whereas the thicker O-rings will create a lot of cushion space between your keycaps and bottom, almost completely dampening the “thock” sound.
However, with thicker O-rings, your keyboard would have a “mushy” feel to it whenever you type on it.
A good practice is to start with thinner O-rings and stack them on top of each other until you get your preferred sound.
Material
Generally, there are two types of materials used in the processing of O-rings, mainly rubber and silicone. The job of both materials is the same and that is to dampen the noise.

Technically, natural rubber has higher tensile and abrasion resistance than silicone. At the same time, silicone O-rings are cheaper as compared to rubber O-rings.
Level of Hardness
How hard or soft an O-ring is generally measured by the durometer scale. The durometer scale ranges from 0A-100A to specify the hardness of a material. This gives you an overall idea about the softness or hardness of an O-ring without physically testing it.
For example, an O-ring with a 40A durometer number is softer than an O-ring with a 70A durometer number. So an O-ring with a higher durometer number will absorb less sound as compared to an O-ring with a lower durometer number.
How to Install O-Rings on Your Keyboard?
If you haven’t opened a keyboard before, then attaching O-rings to your keycap can be a hectic job for you. But it’s super fun to do and here’s how you do it easily:
- Put your keyboard on a straight and clean surface. If you are using a wireless keyboard, then don’t forget to switch it off or take out the batteries.
- Now in order to take out the keycaps, I recommend you use a keycap puller. You can easily get one from Amazon or your local computer store.
- Start to pull off the keycaps one by one. Again, it’s better to pull off the keycaps and lay them out on the table in the same sequence as they were installed on the keyboard. This will make your job easier to put them back once you have successfully attached the o-rings.
- Once you have taken out all the keycaps, it’s time to use a blower or compressed air that can remove the excess dust residing inside.
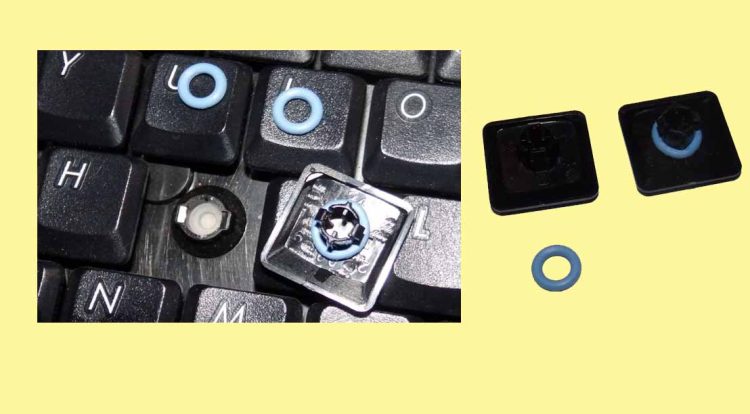
- Now take out each keycap one by one and attach the o-ring to the stem at the back. See the image below for reference

- Once you attach the O-ring to the keycap, put that keycap back into its space on your keyboard.
- Done!
Pros & Cons of Using O-Rings on a Keyboard
First thing first, O-rings are ideal to have, here’s why:
Pros
- Cheaper to get
- Easy to install
- Dampen keystroke noise
- Enable you to type faster
Cons
- Rubbery feel when typing
- Difficult to get used to
Conclusion
Installing O-rings is the most budget-friendly way to get rid of the “thwack” sound on your mechanical keyboard. They can save you a lot of money that you may end up spending on buying an expensive keyboard just to have a noise-free typing experience.

Hi, this is Masab, the owner and founder of the PC Wire. I’m a PC enthusiast who loves to talk about computers. I have been testing PC hardware for several years now, and I hope my knowledge would answer your queries thoroughly.

