
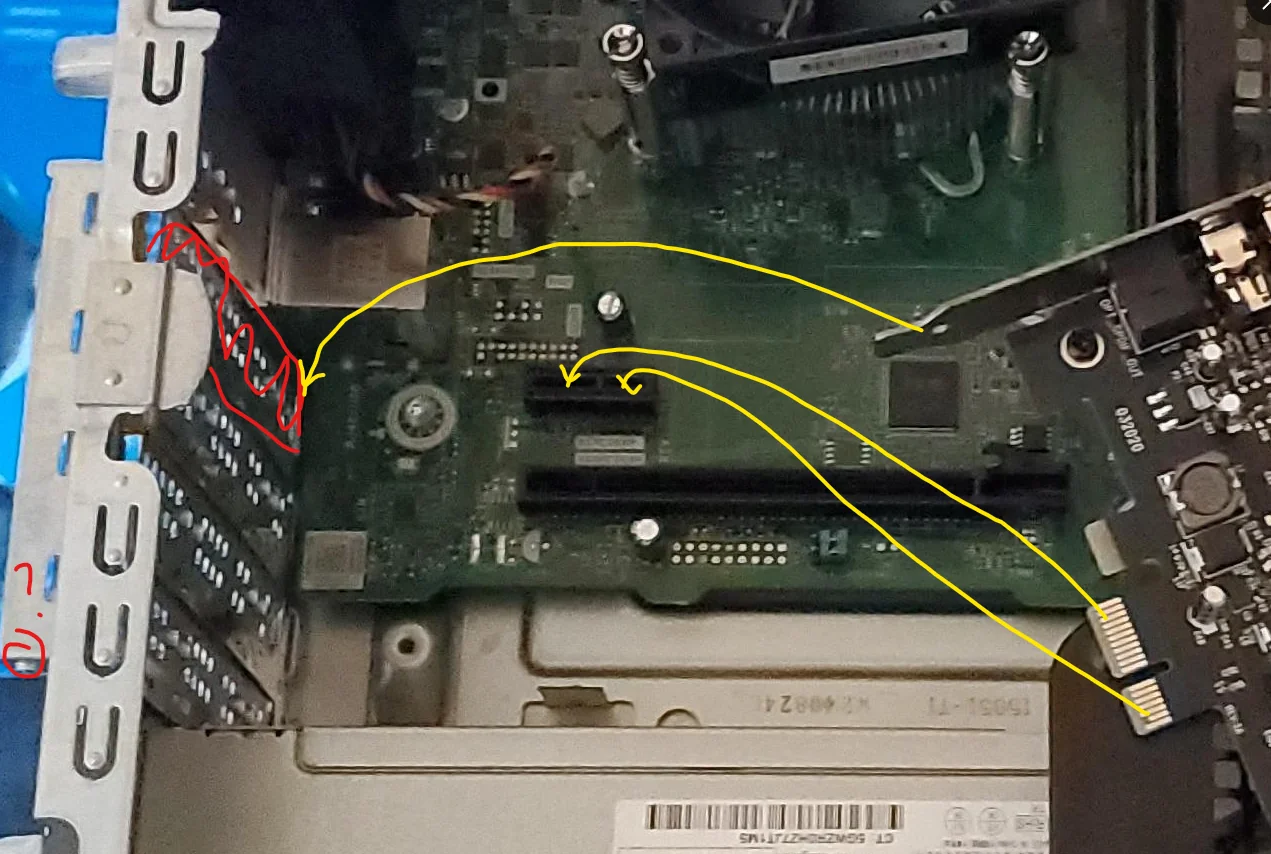
How To Install a New Sound Card In Your PC?
Installing a new sound card in your PC is an excellent way to improve audio quality, reduce unwanted noise, add surround sound capabilities, or get better performance from high-quality headphones and speakers.
Whether you’re a gamer looking for immersive sound, a music enthusiast seeking clearer audio, or someone dealing with a faulty onboard audio system, a dedicated sound card can be a worthwhile upgrade.
The good news is that installing an internal sound card is relatively simple, even if you have little experience building or upgrading computers.
What Is a Sound Card, and Why Would You Need One?
A sound card is a computer hardware component responsible for processing audio input and output. It converts digital audio signals into analog signals for speakers and headphones, and, when equipped with an input converter, converts analog microphone signals into digital audio.
Most modern motherboards already include integrated audio hardware. However, a dedicated sound card can provide additional features and potentially better audio performance.
Benefits of installing a dedicated sound card
- Improved sound quality: Better digital-to-analog converters (DACs) and analog circuitry can reduce noise and distortion.
- Enhanced headphone performance: Some cards feature dedicated amplifiers for demanding headphones.
- Surround sound support: Selected models offer multichannel analog output or digital surround encoding.
- Better audio connections: Additional microphone, optical, line-in, or multichannel outputs.
- Audio customization: Manufacturer software may provide equalizers, virtual surround sound, microphone processing, and gaming sound profiles.
- Replacement for faulty onboard audio: An alternative to replacing the motherboard.
However, upgrading doesn’t automatically guarantee a noticeable difference. If your motherboard already has clean audio output and you use ordinary headphones or USB speakers, an additional sound card might offer little improvement.
What You’ll Need Before Installation
Compatible PCIe sound card
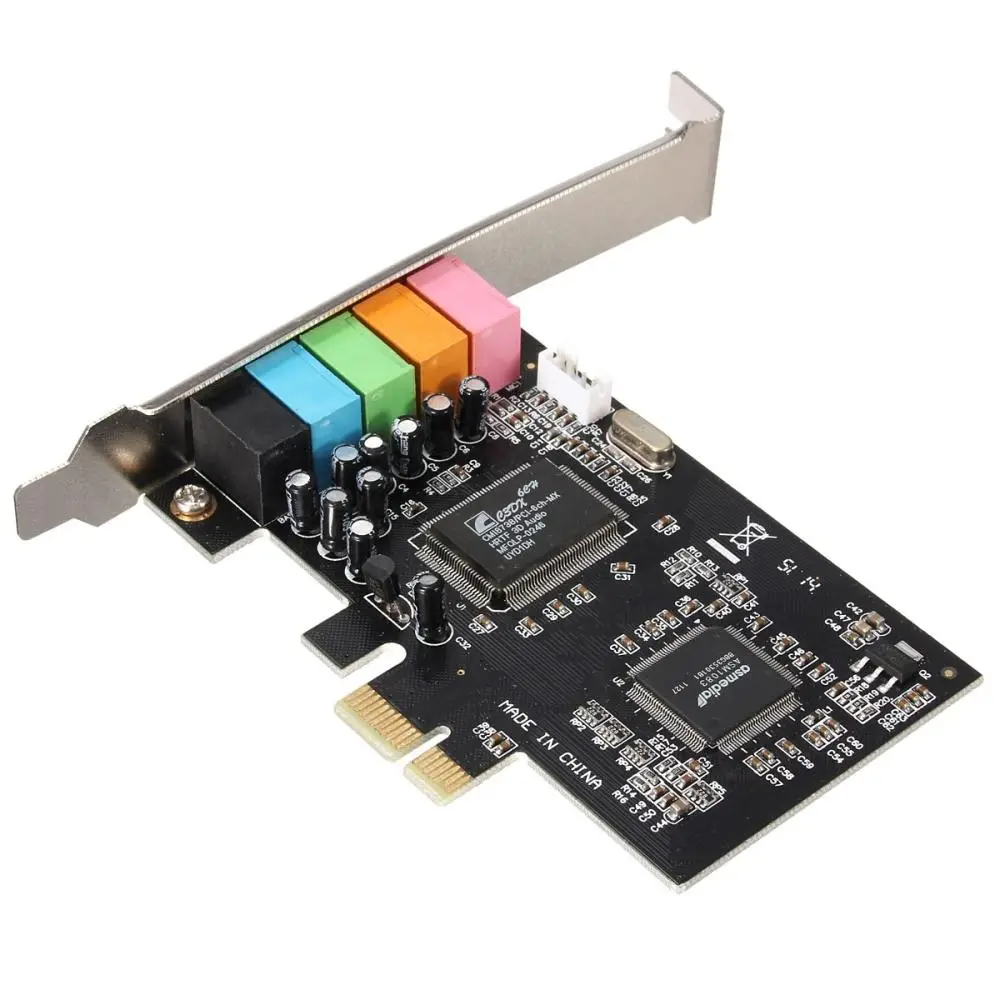
Choose an internal sound card that matches your motherboard, case, operating system, and audio equipment.
Phillips screwdriver
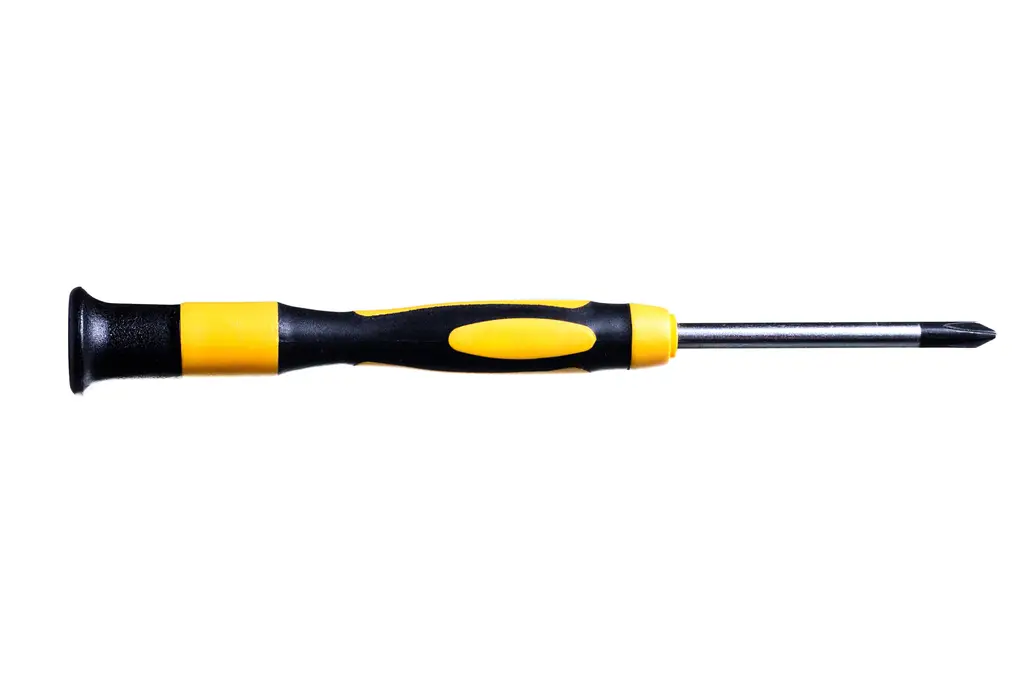
Usually a #2 Phillips screwdriver is sufficient for opening the computer case and securing the expansion-card bracket.
Anti-static precautions
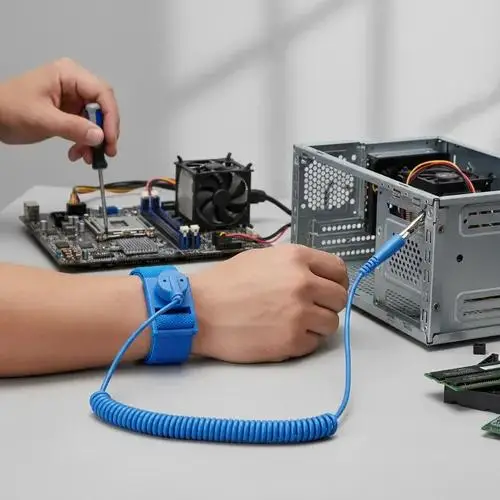
An anti-static wrist strap with a suitable grounding point is helpful. At minimum, work on a non-carpeted surface and avoid touching circuit contacts.
Access to your desktop PC
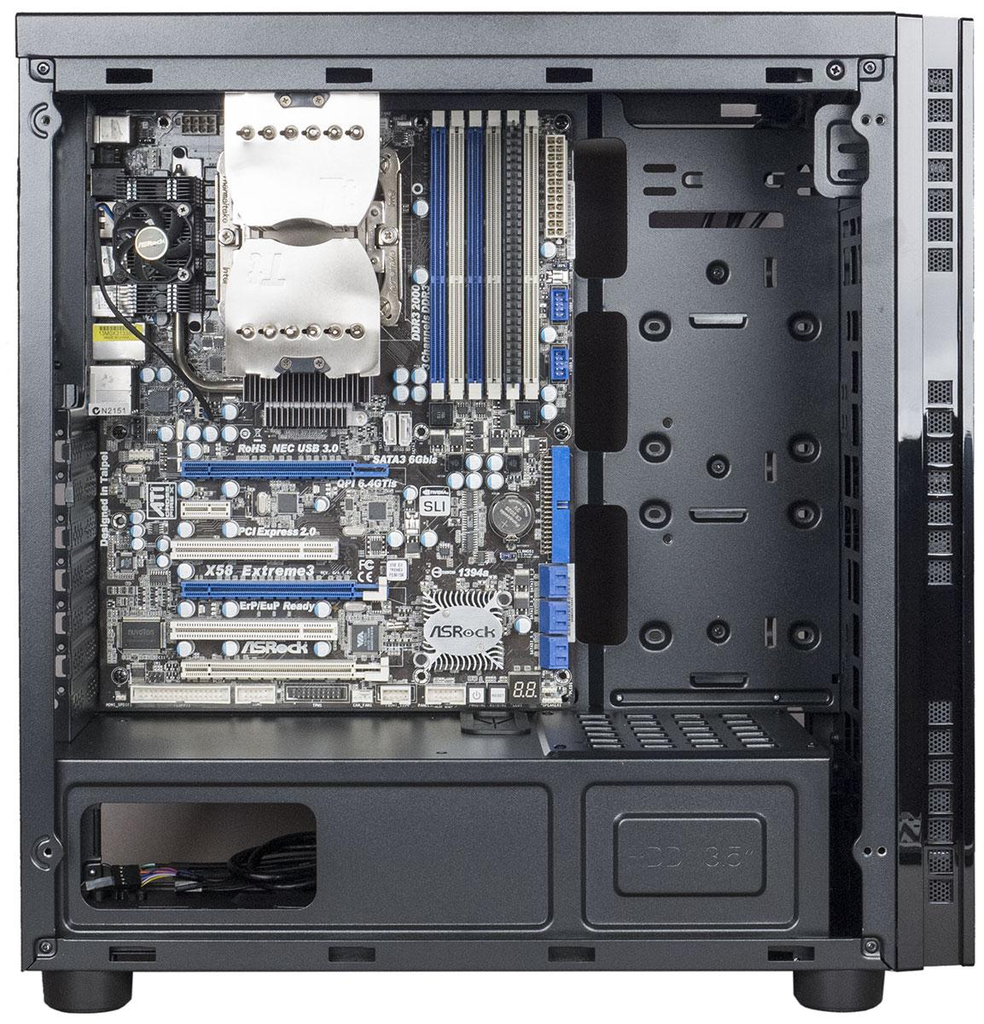
You need a compatible expansion slot, enough space around the graphics card, and access to the back of the case.
You may also need a compatible power cable for certain sound cards, an HD Audio front-panel cable connection, and an internet connection to download the manufacturer’s drivers.
Check Sound Card Compatibility Before Installing
Before buying or installing a sound card, verify that it will work with your system.
| Component | What to check |
|---|---|
| Motherboard | Available PCIe slot |
| PC case | Full-height or low-profile bracket |
| Graphics card | Enough physical clearance |
| Operating system | Manufacturer-supported Windows or Linux drivers |
| Power supply | Any additional power connector required |
| Audio equipment | Compatible headphone, microphone, speaker, or digital connections |
Understanding PCIe slots
Most modern internal sound cards use a PCI Express (PCIe) interface. A PCIe x1 sound card can generally be installed in a compatible x1, x4, x8, or x16 slot, provided the slot is electrically enabled and there is enough physical clearance.
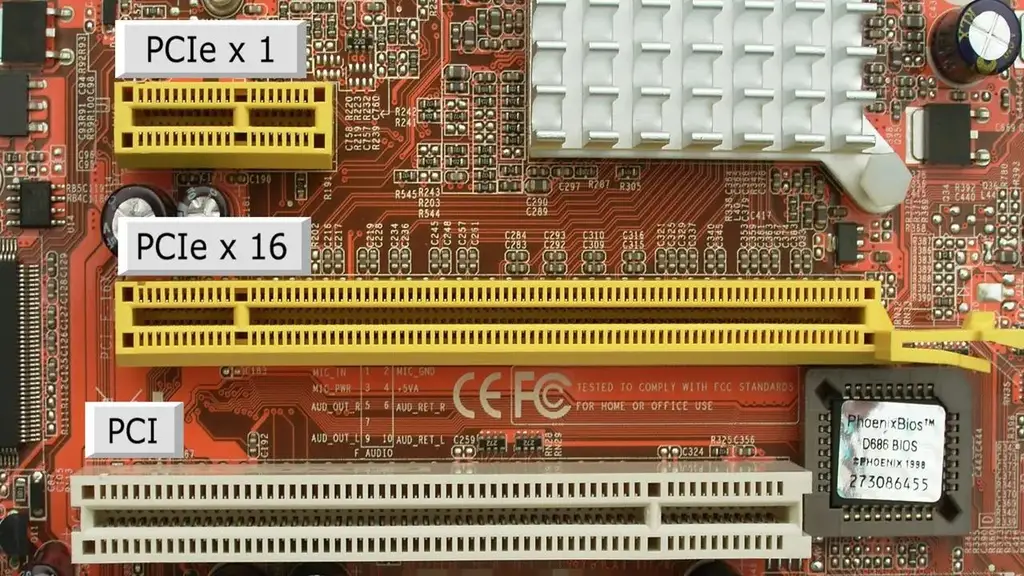
PCIe x1 slots are short, while x16 slots are much longer. Their exact positions vary by motherboard.
Don’t confuse PCIe slots with the older PCI interface. A legacy PCI sound card will not fit directly into a modern PCIe slot.
Also, on some motherboards, certain PCIe slots may become disabled when specific M.2 storage connectors or expansion configurations are in use. Consult your motherboard manual if the slot is not recognized.
How to Install a New Sound Card in Your PC:
Step 1: Shut down your computer and disconnect the power
Completely shut down your PC through Windows. Don’t use Sleep or Hibernate mode.
Once the computer is off:
- Switch off the power supply using the rear switch, if available.
- Unplug the computer’s power cable.
- Disconnect other cables that prevent safe access.
- With power disconnected, press the computer’s power button for several seconds to help discharge residual low-voltage power.
Avoid opening the power supply itself. Its internal capacitors can retain hazardous electrical charges.
Step 2: Open the computer case
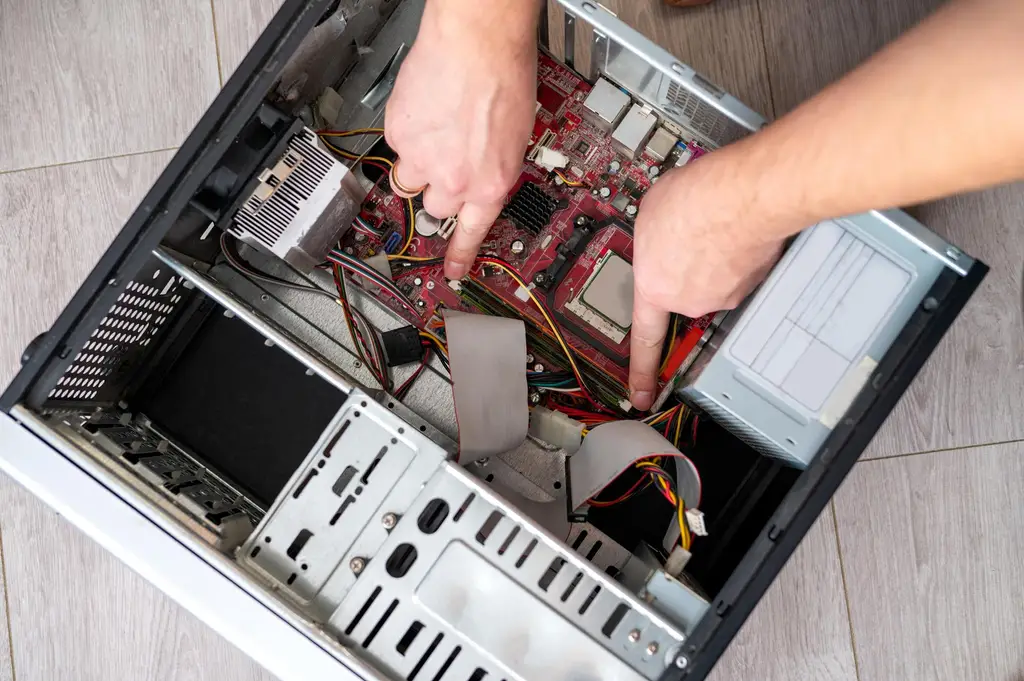
Place your computer on a stable, clean surface with good lighting.
Most desktop PC cases have a removable side panel secured with thumbscrews or standard screws.
Remove the panel and place its screws somewhere safe. Depending on your case design, you might need to slide the panel backward or release a locking mechanism.
Tip: Take a photo of the inside of your computer before making changes. It can help you identify original cable positions.
Step 3: Locate an available PCIe slot
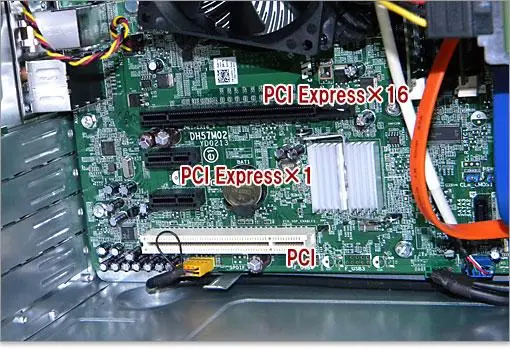
Find an unused PCIe slot on your motherboard.
Sound cards typically use a PCIe x1 connection. The expansion slot should line up with an opening on the back of the computer case.
Consider the following before choosing a slot:
- Avoid placing the card too close to your GPU cooling fans.
- Make sure the sound card’s circuit board will not collide with another component.
- Check your motherboard manual to confirm the slot supports expansion devices.
- Leave adequate space for cables connected to the sound card.
Step 4: Remove the metal expansion-slot cover
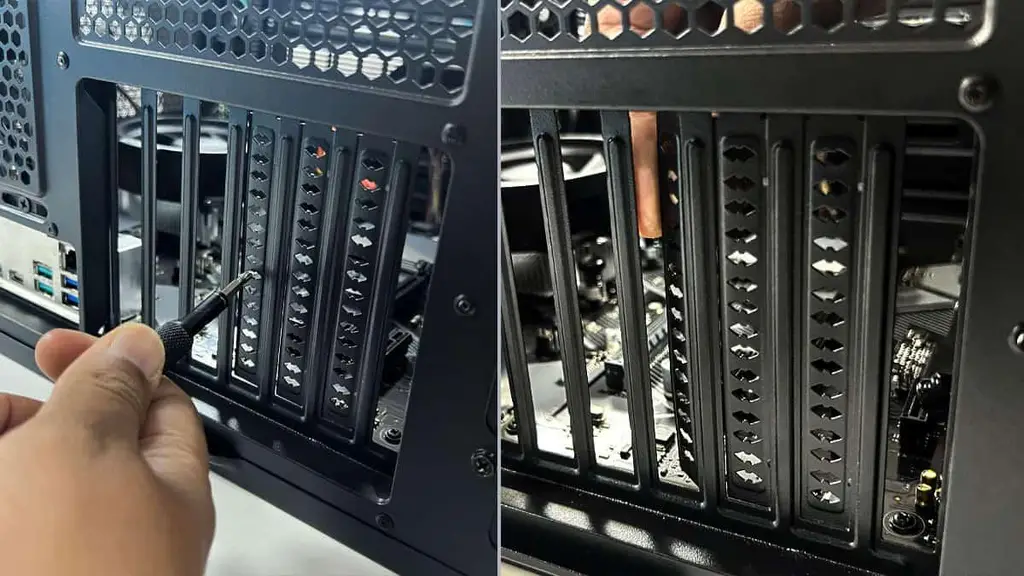
Locate the metal slot cover corresponding to the PCIe slot you have selected.
Depending on your case, remove the retaining screw or bracket, then take out the appropriate cover.
Keep the screw because you’ll typically use it to secure the new card.
Some budget cases use breakaway slot covers rather than reusable ones.
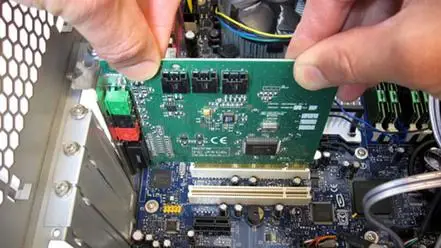
Step 5: Insert the new sound card
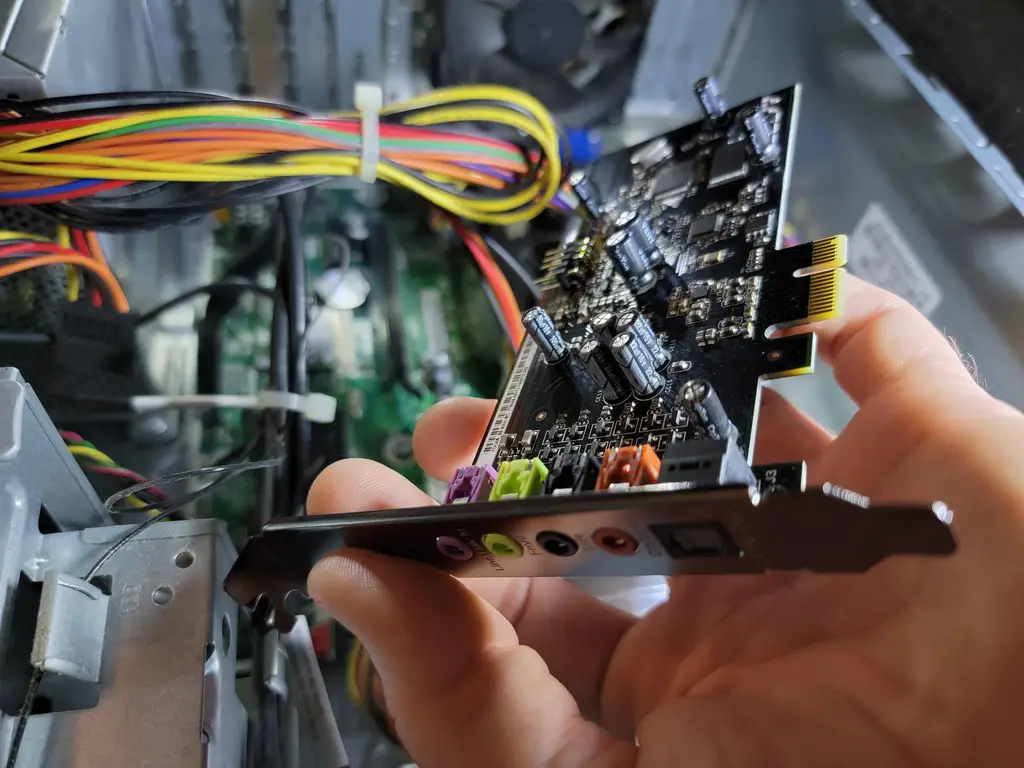
This is the most important part of the installation.
- Hold the sound card by its metal bracket and circuit-board edges.
- Align the PCIe connector with the motherboard slot.
- Position its rear metal bracket correctly in the case opening.
- Press the card straight down with gentle, even pressure until fully seated.
- Secure the bracket with the retaining screw or case locking mechanism.
The card should sit straight and remain stable.
Important: Never force a sound card into a slot. If the card does not fit easily, check alignment, nearby components, and slot compatibility.
Creative’s official instructions for the Sound Blaster AE-5 family also emphasize careful alignment and firm but gentle insertion.
Step 6: Connect additional cables if required
Not all PCIe sound cards need additional cables.
Some cards draw all the electricity they need directly from the PCIe slot. Others have supplementary power connections for certain features or for the card itself.
For example, the Creative Sound Blaster AE-5 Plus uses PCIe bus power for audio operation but requires a four-pin Molex power connector for its Aurora lighting system. Creative Support
Other possible internal connections include:
- HD Audio front-panel header: Allows compatible front-panel headphone and microphone jacks to use the sound card.
- Auxiliary power connector: Required by some premium models.
- Internal audio connectors: Present on selected cards for specialized configurations.
Follow the exact wiring diagram for your model. Never connect an incompatible power or lighting connector just because the plug appears similar.
Step 7: Close the case and restart your PC
After securing the card and checking your connections:
- Confirm no tools or loose screws remain inside the case.
- Make sure no cables interfere with fans.
- Reinstall the side panel.
- Reconnect the power cable, monitor, and peripherals.
- Switch on the power supply and start the computer.
Windows may automatically detect the new sound card when the system boots.
If the card is not detected immediately, don’t assume it is defective. Some models require drivers to be installed before all functions become available.
Step 8: Download and install sound card drivers
A driver allows your operating system to communicate properly with the sound card.
Windows 11 can automatically install many audio drivers through Windows Update, but manufacturer-provided software may be necessary to access features such as custom equalizers, headphone amplification settings, multichannel audio, or microphone effects. Microsoft Support
How to install drivers:
- Visit the official sound card manufacturer’s website.
- Open its Support or Downloads section.
- Search for the exact model number.
- Select your operating system.
- Download the compatible driver package.
- Run the installer and follow the instructions.
- Restart your PC if requested.
Useful manufacturer support links:
Avoid unofficial driver-download websites because their packages may be outdated, incompatible, or unsafe.
Step 9: Set your new sound card as the default audio device
Once the drivers are installed, configure Windows to use the new card.
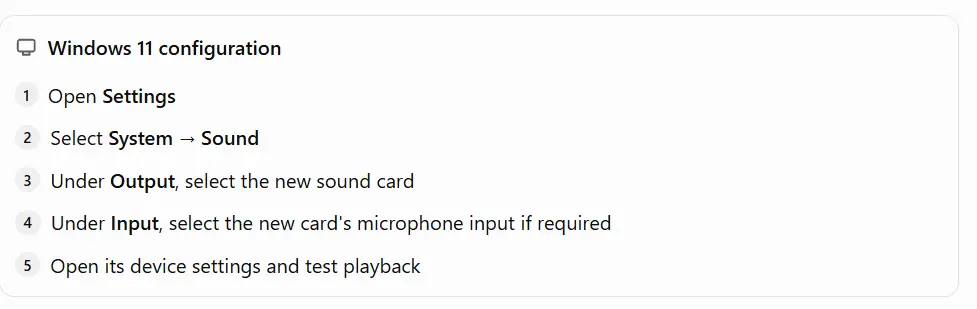
If you need to assign a default device for all compatible applications, open More sound settings, then use the Playback and Recording tabs to select the preferred default devices.
The exact menu wording may vary slightly between Windows versions.
Step 10: Test the sound card
Connect your headphones or speakers to the correct output on the new sound card rather than the motherboard’s old audio port.
Test the following:
- Left and right stereo channels
- Speaker volume
- Microphone recording, if supported
- Surround sound channels, if applicable
- Headphone clarity and background noise
- Audio playback in games, music, and video applications
Begin with low volume, especially if the sound card has a powerful headphone amplifier.
If everything works correctly, your new sound card is ready to use.
How to Install an External USB Sound Card
Not every PC supports an internal PCIe sound card. If you have a laptop, compact computer, or desktop without a suitable PCIe slot, a USB sound card is another option.
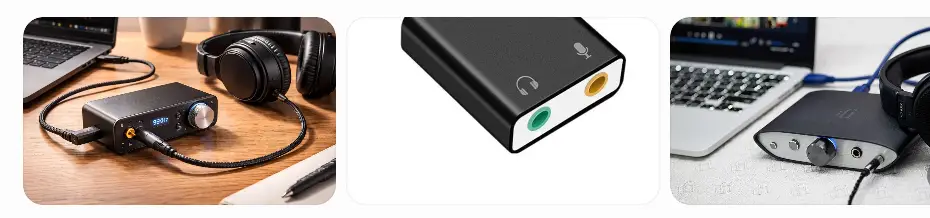
USB audio devices are generally easier to install because they don’t require opening the computer case.
Installation procedure:
- Connect the USB sound card to a compatible USB port.
- Allow Windows to detect the device.
- Install the manufacturer’s driver if required.
- Connect your speakers, headphones, or microphone.
- Select the device under Windows Sound settings.
- Test the audio output.
Basic USB audio adapters can replace a broken headphone jack, while more advanced external DACs and audio interfaces may provide improved sound, additional connections, and professional recording features.
Internal vs. External Sound Cards: Which Is Better?
| Feature | Internal PCIe card | External USB card |
|---|---|---|
| Installation | Requires opening PC | Usually plug-and-play |
| Desktop compatibility | Requires PCIe slot | Requires compatible USB port |
| Laptop compatibility | Generally unsuitable | Good |
| Audio quality | Depends on model | Depends on model |
| Portability | Low | High |
| Upgrade flexibility | Desktop-focused | Easy to move between PCs |
| Electrical interference | Depends on shielding and design | Can avoid some internal PC noise |
| Additional power | Sometimes required | Sometimes required |
Verdict: Internal PCIe sound cards are a convenient option for permanent desktop installations, especially when you want multichannel analog outputs and integrated audio controls.
External USB DACs and audio interfaces are often better for laptops, portable setups, and users who need dedicated recording inputs.
Neither design is inherently superior in sound quality. Performance depends on the hardware, drivers, and connected audio equipment.
Common Sound Card Installation Problems and Solutions
Even a correctly installed sound card can experience detection, driver, or configuration problems.
| Problem | Possible cause | Recommended solution |
|---|---|---|
| Sound card not detected | Incorrect seating or disabled PCIe slot | Reseat card; check motherboard manual |
| No sound | Wrong playback device | Select new card in Sound settings |
| Distorted audio | Excessive gain, clipping, or driver issue | Lower volume and gain; update drivers |
| Microphone not working | Wrong input or permissions | Check recording device and app permissions |
| Crackling or popping | Driver, latency, or signal problem | Update software and test another application |
| Front audio ports don’t work | HD Audio header not connected | Check card and case wiring |
| Surround sound unavailable | Incorrect settings or connection | Configure channels in Windows and vendor software |
| Computer fails to boot | Hardware conflict or installation issue | Power off and check card seating and connections |
Fix 1: Check Device Manager
If Windows does not recognize the sound card:
- Right-click the Start button.
- Open Device Manager.
- Expand Sound, video and game controllers.
- Look for your sound card’s name.
- Check whether a yellow warning symbol appears.
- Update or reinstall the compatible manufacturer driver if necessary.
Microsoft identifies missing, outdated, disabled, or incorrectly loaded audio drivers as possible causes of an undetected audio device. Microsoft Support
Fix 2: Disable onboard audio only if necessary
Sometimes multiple installed audio devices make it confusing to select the desired output.
You can choose the default audio device in Windows without disabling the integrated motherboard audio.
If there is a specific compatibility problem, consider disabling the onboard audio controller through BIOS/UEFI, provided you understand the consequences and have confirmed the replacement card works.
This is normally an optional troubleshooting measure, not a required installation step.
Fix 3: Resolve background static or buzzing
If you hear electrical noise:
- Confirm the audio cable is connected securely.
- Try another cable or headphone set.
- Move analog audio cables away from major power cables.
- Test another speaker or amplifier connection.
- Reduce excessive input gain.
- Check for ground-loop interference when using externally powered speakers.
A dedicated sound card can sometimes reduce unwanted noise compared with poor motherboard audio, but it can also experience interference in certain PC configurations.
Fix 4: Reinstall the correct drivers
When troubleshooting software problems, use the driver package intended for the exact card and Windows version.
Microsoft also recommends checking its built-in audio troubleshooting tools and the device manufacturer’s driver support when playback problems persist. Microsoft Support
Sound Card Review: Popular Types and Models
Below are two established internal PCIe options and an alternative worth considering. These are specification-based assessments, not hands-on benchmark results.
1. Creative Sound BlasterX AE-5 Plus
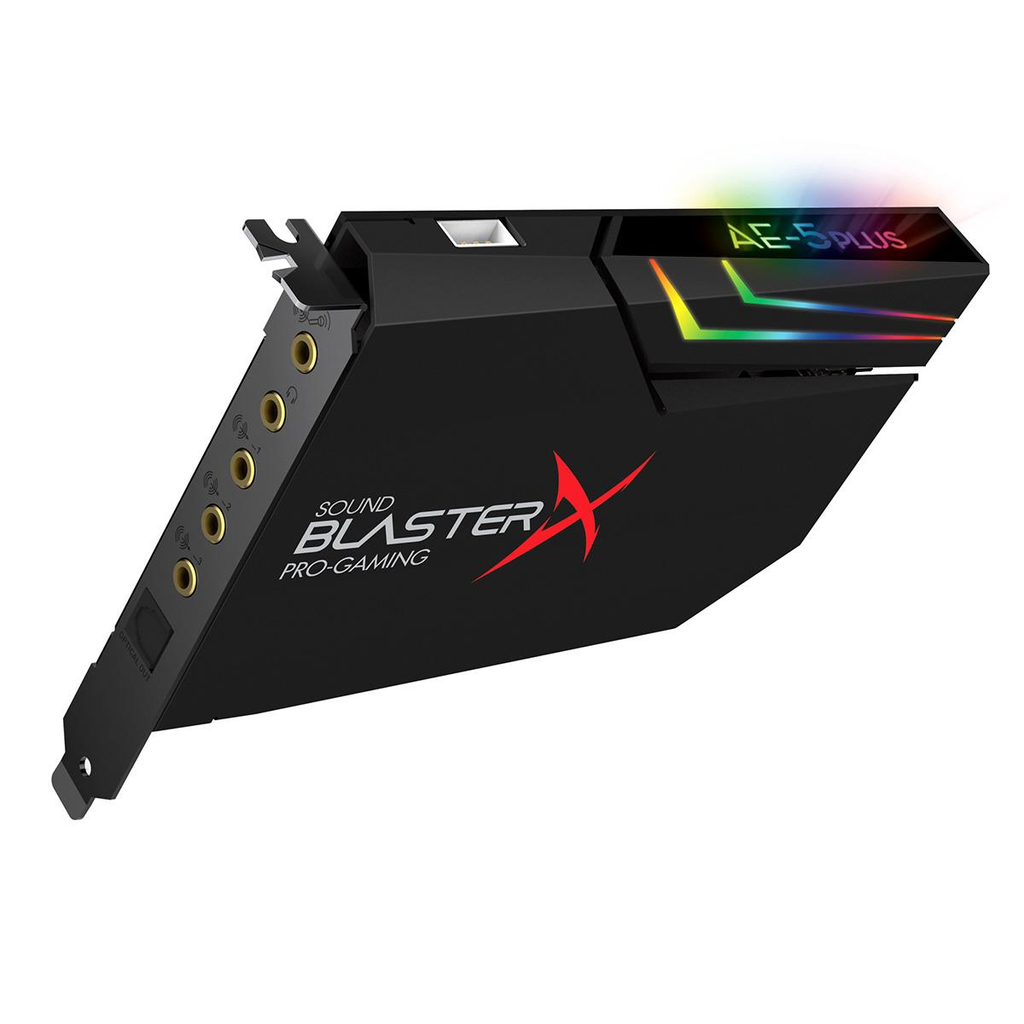
Gaming and premium headphone audio
A dedicated PCIe sound card with a SABRE-class DAC, headphone-focused features, surround-sound functionality, and RGB lighting.

Pros
- Extensive audio customization, multiple output options, gaming-oriented software.

Cons
- More expensive than basic cards; RGB lighting requires a suitable power connection.
Best suited for desktop gamers who want additional audio controls and analog connectivity. Creative Labs (United States)+1
2. ASUS Xonar SE
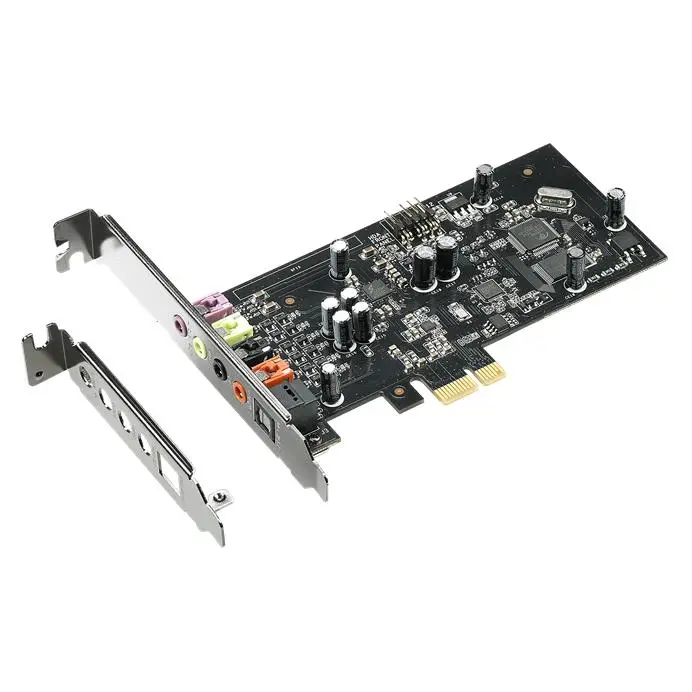
Straightforward desktop audio upgrade
A 5.1-channel PCIe sound card offering analog speaker connections and a bundled low-profile bracket for smaller compatible computer cases.
Pros
- Multichannel audio, compact design, useful for replacing inadequate integrated audio.
Cons
- Less feature-rich than premium gaming cards; driver compatibility should be checked before purchasing.
Best suited for budget-conscious desktop upgrades and compatible 5.1-channel speaker systems.
3. External USB Audio Interface
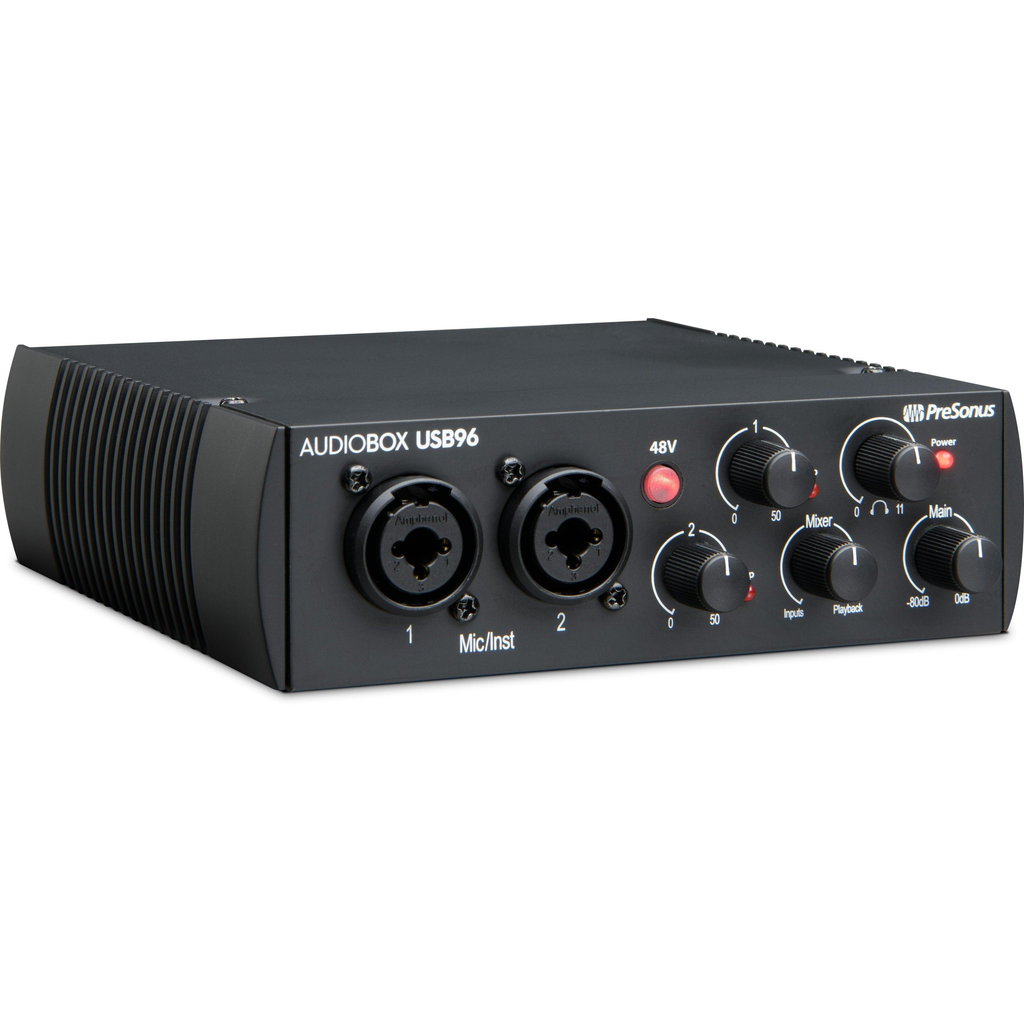
Recording, streaming, and flexible connectivity
An external audio interface often offers dedicated microphone inputs, headphone monitoring, adjustable input gain, and recording-focused drivers.
Pros
- Excellent for microphones and recording, easy access to controls, portable.
Cons
- Takes up desk space; professional recording features may be unnecessary for everyday listening.
Best suited for musicians, podcasters, streamers, and content creators.
How Much Does a Sound Card Installation Cost?
The cost depends primarily on the sound card itself, whether additional cables are required, and whether you install the hardware yourself.
The following are approximate planning ranges in USD, not verified live retail quotes.
| Item | Approximate cost |
|---|---|
| Basic USB audio adapter | $10–$25 |
| Entry-level internal PCIe card | $30–$60 |
| Midrange gaming sound card | $70–$150 |
| Premium internal sound card | $150–$350+ |
| External USB audio interface | $50–$250+ |
| Professional installation labor | $30–$80+ |
Installing the card yourself typically eliminates labor costs. Most people with a compatible desktop PC will not need specialized tools beyond a screwdriver.
Is Installing a Dedicated Sound Card Worth It in 2026?
A dedicated sound card can still be a worthwhile upgrade, but modern integrated motherboard audio is often sufficient for ordinary listening, gaming, and video playback.
When a dedicated sound card is worth buying
- Your onboard audio produces noticeable hiss, buzzing, or distortion.
- You need specific analog surround sound connections.
- Your headphones require more output power than your motherboard provides.
- You want dedicated hardware and software audio controls.
- Your motherboard audio has failed.
- You need additional connectivity that isn’t available on your current PC.
When you probably don’t need one
- Your motherboard audio is already clean and powerful enough.
- You primarily use USB or Bluetooth headphones.
- You use audio through HDMI or DisplayPort to a monitor or AV receiver.
- Your speakers have their own digital audio processing.
- You don’t need additional audio inputs or outputs.
For USB headphones, a new PCIe sound card generally won’t improve playback because the USB headset uses its own audio processing.
Likewise, a separate sound card isn’t necessarily the best solution for recording music. A dedicated USB audio interface with the appropriate microphone preamps and drivers is often more practical.
Final Review: Should You Install a New Sound Card?
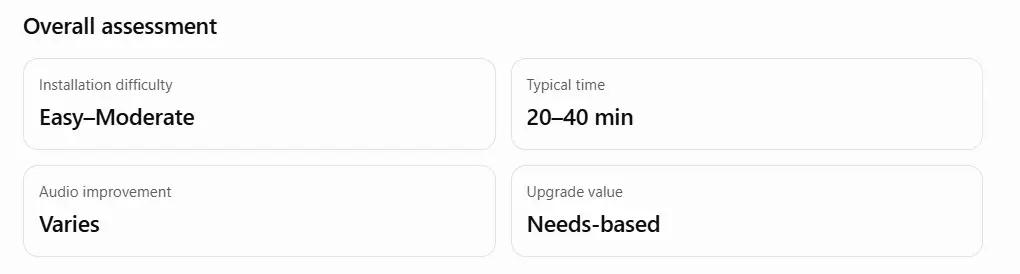
Installing a new sound card is one of the more accessible desktop PC hardware upgrades. The process usually involves inserting a compatible PCIe card, securing it inside the computer case, installing the correct drivers, and configuring Windows to use the new audio device.
For users experiencing poor onboard audio, missing connections, or insufficient headphone output, a dedicated card can be a useful improvement.
However, a new sound card isn’t an automatic sound-quality upgrade for every PC. Before purchasing one, consider your current audio hardware, the equipment you connect, and the specific problem you’re trying to solve.
For most desktop users who genuinely need additional audio features, a compatible midrange PCIe sound card is a sensible choice. For laptop owners, streamers, and recording enthusiasts, an external USB DAC or audio interface may offer greater flexibility.
Bottom line: Check compatibility first, follow proper electrical safety precautions, install official drivers, and test each audio connection. With the right hardware, installing a new sound card is a manageable DIY project that can improve the audio capabilities of your PC.

Hi, this is Masab, the owner and founder of the PC Wire. I’m a PC enthusiast who loves to talk about computers. I have been testing PC hardware for several years now, and I hope my knowledge would answer your queries thoroughly.